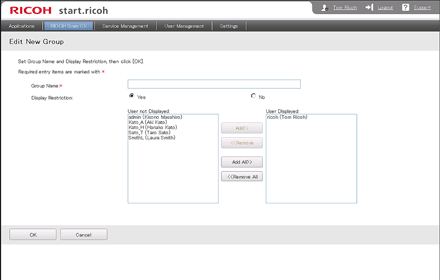
Multiple projects can be assigned to a group according to their usage.
If multiple organizations use the same machine, it is useful to create groups based on contents settings or organization names.
Created groups are displayed as tabs on the machine's operating screen.

Item |
Contents |
|---|---|
Group Name |
Set a group name using up to 128 characters. A group name consisting of only single-byte spaces cannot be used. |
Display Restriction |
This appears when the profile is set to Authentication Mode.
|
Creating a Group
![]() Click
Click ![]() in the profile for the group you want to create, and then select [New Group].
in the profile for the group you want to create, and then select [New Group].
The [Edit New Group] screen appears.
![]() Set the properties of the group, and then click [OK].
Set the properties of the group, and then click [OK].
Editing the Properties of a Group
![]() Click
Click ![]() in the group you want to edit, and then select [Group Properties].
in the group you want to edit, and then select [Group Properties].
The [Group Properties] screen appears.
![]() Set the properties of the group, and then click [OK].
Set the properties of the group, and then click [OK].
Copying a Group
![]() Click
Click ![]() in the group you want to copy, and then select [Copy Group].
in the group you want to copy, and then select [Copy Group].
The confirmation screen appears.
![]() Click [OK].
Click [OK].
Deleting a Group
![]() Click
Click ![]() in the group you want to delete, and then select [Delete Group].
in the group you want to delete, and then select [Delete Group].
The confirmation screen appears.
![]() Click [OK].
Click [OK].
Changing the Group Display Order
![]() Click
Click ![]() in the group to change the display order, and then select [Display Order: Up] or [Display Order: Down].
in the group to change the display order, and then select [Display Order: Up] or [Display Order: Down].
![]()
Groups that are displayed in order in the left menu will be arranged as tabs on the left side in the project selection menu.
It takes up to an hour to apply the specified settings to the machine. To apply the settings immediately, carry out one of the following:
Execute [Update] in [Profile Management] in Administration Tool.
In the project selection menu on the machine's control panel, press [Update].
Reboot the machine.

