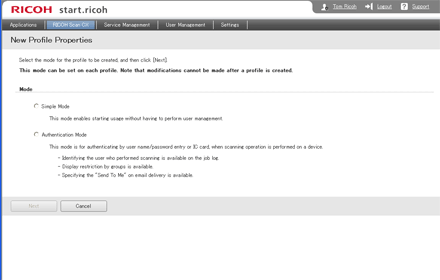
Mode selection menu
When you create a profile, you can select [Authentication Mode] or [Simple Mode] to specify whether or not to apply user authentication.
![]()
You cannot change the mode once it has been set.

Item |
Contents |
|---|---|
Simple Mode |
Select this if user authentication is not performed. |
Authentication Mode |
When card authentication is disabled To launch Ricoh Scan CX Embedded on the machine, enter a user name and password. When card authentication is enabled To launch Ricoh Scan CX Embedded on the machine, use a smart card to perform authentication. Register the user information managed in Card Authentication Package V2 to the user information registered in "start.ricoh". For information about how to log in using Card Authentication Package V2, see Card Authentication Package V2 User's Guide. |
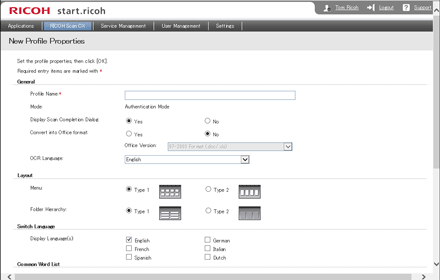
Detailed properties window

Item |
Contents |
|---|---|
Profile Name |
Set a profile name using up to 128 characters. A name consisting of only single-byte spaces cannot be used. |
Mode |
Displays the mode of the profile: Simple Mode or Authentication Mode. |
Display Scan Completion Dialog |
Specify whether or not a message appears when scanning is completed. |
Convert into Office Format |
Specify whether or not to use the Office conversion function for documents scanned using OCR. |
Office Version |
Select a file format if [Yes] is selected for [Convert into Office Format]. |
OCR Language |
Set the language for scanning documents using OCR. |
Layout |
|
Switch Language |
Select the display language. You can select up to two languages. |
Common Word List |
Set the words to be registered to the Word List. Up to 50 characters can be used for each word. The words which are set can be used for entering file names. Up to 60 words can be registered. A word consisting of only single-byte spaces cannot be registered. The following characters cannot be used: \ / : * ? " < > | |
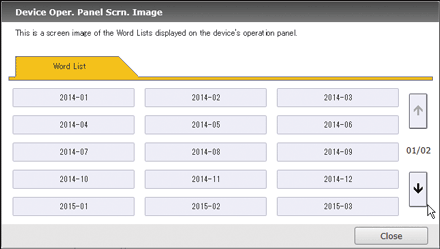
Device Oper. Panel Scrn. Image |
You can check how the Word List is displayed on the machine's control panel. Pressing [
|
Creating a Profile
![]() Log in to start.ricoh, and then click [RICOH Scan CX].
Log in to start.ricoh, and then click [RICOH Scan CX].
![]() Click [New Profile].
Click [New Profile].
The [New Profile Properties] screen appears.
![]() Select [Simple Mode] or [Authentication Mode], and then click [Next].
Select [Simple Mode] or [Authentication Mode], and then click [Next].
![]() Set the properties of the profile, and then click [OK].
Set the properties of the profile, and then click [OK].
Editing the Properties of a Profile
![]() Log in to start.ricoh, and then click [RICOH Scan CX].
Log in to start.ricoh, and then click [RICOH Scan CX].
![]() Click
Click ![]() in the profile to be edited, and then select [Profile Properties].
in the profile to be edited, and then select [Profile Properties].
The [Profile Properties] screen appears.
![]() Set the properties of the profile, and then click [OK].
Set the properties of the profile, and then click [OK].
Copying a Profile
![]() Click
Click ![]() in the profile you want to copy, and then select [Copy Profile].
in the profile you want to copy, and then select [Copy Profile].
The confirmation screen appears.
![]() Click [OK].
Click [OK].
Deleting a Profile
![]() Log in to start.ricoh, and then click [RICOH Scan CX].
Log in to start.ricoh, and then click [RICOH Scan CX].
![]() Click
Click ![]() in the profile you want to delete, and then select [Delete Profile].
in the profile you want to delete, and then select [Delete Profile].
The confirmation screen appears.
![]() Click [OK].
Click [OK].
![]()
It takes up to an hour to apply the specified settings to the machine. To apply the settings immediately, carry out one of the following:
Execute [Update] in [Profile Management] in Administration Tool.
In the project selection menu on the machine's control panel, press [Update].
Reboot the machine.


