
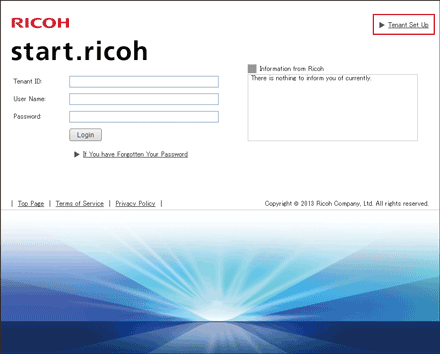
![]() Click [Tenant Set Up] on the login screen.
Click [Tenant Set Up] on the login screen.
![]() Select the appropriate [Country/Region].
Select the appropriate [Country/Region].
![]() Confirm the terms of use, select the [Agree] checkbox, and then click [Next].
Confirm the terms of use, select the [Agree] checkbox, and then click [Next].
![]() Enter [Tenant ID], [Registration Code], [Main Email Address], and [Reply Email Language], and then click [Next].
Enter [Tenant ID], [Registration Code], [Main Email Address], and [Reply Email Language], and then click [Next].
Use the tenant ID and registration code that were issued when the product was purchased.
![]() Check the entered information and click [Send].
Check the entered information and click [Send].
![]() When the sent e-mail confirmation screen is displayed, check the URL notification e-mail sent to the registered e-mail address, and then access the specified URL.
When the sent e-mail confirmation screen is displayed, check the URL notification e-mail sent to the registered e-mail address, and then access the specified URL.
![]() Enter [Registration Code], [Tenant Information], and [User Information], and then click [Next].
Enter [Registration Code], [Tenant Information], and [User Information], and then click [Next].
![]() Check the entered information, and then click [Next].
Check the entered information, and then click [Next].
![]() Click [OK].
Click [OK].
Tenant setup is now complete. Check the tenant setup notification e-mail sent to the registered e-mail address.