
Preparing the Machine for Use with RICOH Smart Device Connector
Before using a machine with RICOH Smart Device Connector, configure the machine accordingly.
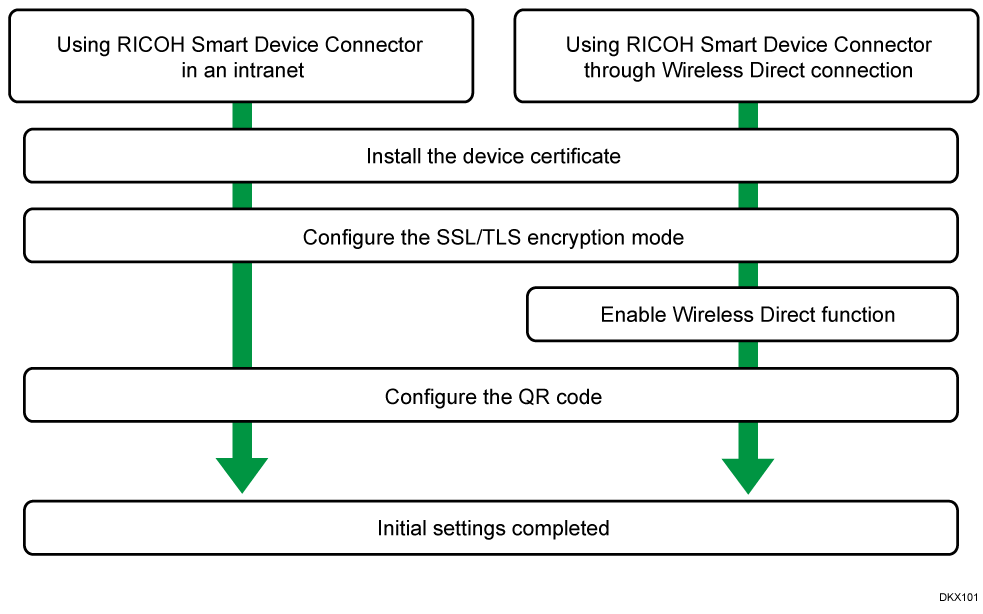
Connecting to the MFP/Printer
Install a Device Certificate on the machine, and configure SSL/TLS Encryption Mode. If an access point in the intranet is not available configure the access point function that is built into the machine.
The procedures to use RICOH Smart Device Connector under different connection methods are as follows:
Connecting to a Projector
Specify an appropriate IP address for the projector, and make the device reachable from the intranet.
The procedure to use this connecting method is as follows:
When using the QR code
The QR code for connecting to the projector is displayed on the projected screen. Switch the input signal of the projector to [Network PC], and then press the [Enter] key to show the network information on the screen.
If the QR code for connecting to the projector is not displayed on the projected screen, print the QR code from the smart device, and affix the QR code on the projector. For the procedure to print the QR code, see Printing the QR Code for Connecting to the Projector.
When using the NFC tag
If NFC is being used, additional settings must be specified. For details, see the manual for the corresponding device.
Connecting to the Whiteboard
Specify an IP address on the whiteboard, and make the device reachable from the intranet.
When using the QR code
When connecting to the whiteboard using the QR code, you do not need to configure the settings beforehand.When using the NFC tag
If NFC is being used, additional settings must be specified. For details, see the manual for the corresponding device.
This section explains how to configure the MFP/printer. For details about the network settings of the projector and whiteboard, see the manual provided with each device.